What is the best SDR hardware choice for ATC
Check out our previous blog posts:
- Blog 1: Basic terminology and hardware setup description for ATC listening
- Blog 2: Where to place your antenna for ATC recordings
In this blog post, we will look closer to the hardware (HW) setups for ATC recording from the VHF channel. We did a general overview of the four most important components: Antenna, Coaxial cable, SDR receiver, and computer (and computing resource). We built and tested two HW setups. The first one costs about 200EUR as an “entry solution” and the second one for about 400 EUR as a better one. The table below describes both configurations/setups:
|
Entry solution (more affordable) |
More expensive |
|||
|
Item |
Price |
Item |
Price |
|
|
Antenna |
Sirio Md 118-137 incl. 5m cable |
40 |
Watson WBA-20 |
60 |
|
Coax cable |
- |
0 |
LLC200A 20m |
77 |
|
SDR receiver |
RTL-SDR |
50 |
SDRPlay - RSP1A |
130 |
|
Raspberry Pi |
RPi 3 - 1GB |
40 |
RPi 4 - 8GB |
92 |
|
RPi case |
Metal case + active cooling |
24 |
Argon One |
28 |
|
micro SD |
256GB |
38 |
256GB |
38 |
|
power source |
USB 5V 2.5A |
10 |
USB-C 5V 3A |
10 |
|
SUM |
202 |
435 |
||
Let us discuss the items now.
Antenna and coaxial cable
The antenna is crucial as it has a direct impact on SNR of radio communication. We decided to purchase two tuned dipole antennas for aviation frequencies (118MHz-137MHz). We picked Sirio MD 118-137

and Watson WBA-20.
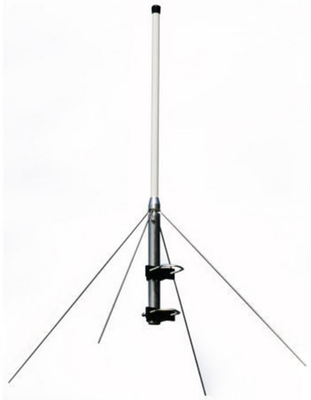
The Sirio is equipped with 5m long coaxial cable. We also purchased 20 meters LLC200A coaxial cable for the Watson antenna to allow us an easy mounting of the antenna on a roof with minimum signal loss. On the other hand, the Sirio is good to mount on a balcony for example.
We did a set of experiments (see details in one of our next blog posts) to estimate the impact of different antennas on ATC voice quality. The voice quality was measured by SNR -- signal-to-noise ratio or rather speech-to-noise ratio. Our conclusion was that we were able to get up to +6dB - +10dB better SNR with the Watson antenna.
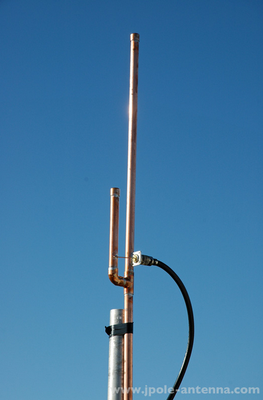
We also tested wideband double discone and narrow band J-pole antennas. This was done in other places and close to the airport so we do not have direct comparison of all four. A custom built J-pole style antenna tuned to 135 MHz was connected to 5 meters of RG-58 type coaxial cable.
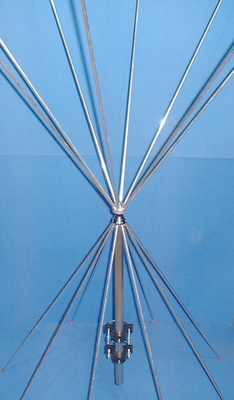
The double discone is a wideband antenna tuned to receive 25-2000MHz. This antenna was connected into an active two way splitter using 2 meters of CFD240 type coaxial cable (up to 5GHz).
Both antennas worked well but we cannot make any deeper comparison. These antennas belong to one of our data feeders who allowed us to use them.
SDR receiver
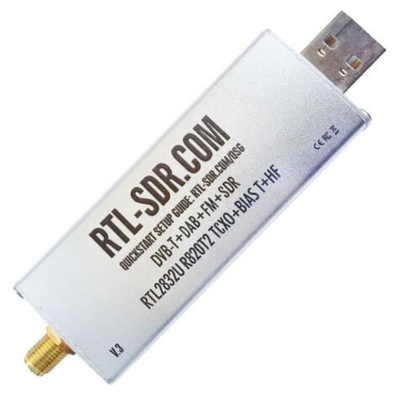
We followed general recommendation and purchased a suggested “standard” for airband the RTL-SDR dongle
We also aimed to test technically better solutions but still for a reasonable budget. After a quick survey we decided to go for SDRplay RSP1A.
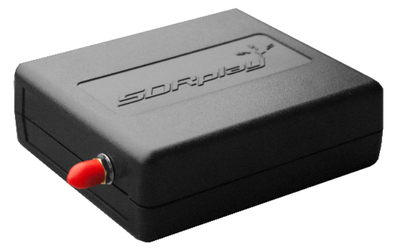
Both receivers have SMA female coaxial cable connector and USB. The difference in internal circuits (gain controllers, filters, ADC, etc.).
The main advantage of SDRplay RSP1A (over RTL-SDR) is, that it is up to 14bits (versus 8bits RTL) and has up to 10.6MHz recording bandwidth (versus 2.5MHz for RTL) - note: the 14bits precision is available up to 6MHz, 12bit up to 8MHz, 10bit up to 9.2Mhz and 8bit above 9.2MHz bandwidth. Both of these options are critical, because we are targeting to collect all available frequencies used by the given airport (Tower, Approach, Radar, Ground, Departure, ...) to monitor the whole flight communication. It happens often, that the frequencies are spread in the larger window than 2.5MHz (RTL dongle). Sometimes even the 10MHz bandwidth is not enough, thus two receivers would be required. Next, the 14bits bit depth may help to get a better SNR (signal to noise ratio), but it depends on the bandwidth used. Please see this post aiming at deeper channels vs. bandwidth analysis and suggestions.
Computer
We decided to use the Raspberry Pi mini computer that is used for running the SDR software and processing pipeline. Both Raspberry Pi are small and powerful enough. We bought a RPi 3B+ (with 1GB of RAM) as an ‘entry solution’ and a most powerful RPi 4 with 8GB RAM. We used 256GB microSD for system and data storage. To avoid overheating, we also used active cooling (heatsink and fan). You have several tens of combinations of RPi models and cases. You probably want to go with a good passive heatsink to minimize the noise coming from the fan. The RPi 4 in the Argon One case (url: https://www.amazon.com/Argon-Raspberry-Aluminum-Heatsink-Supports/dp/B07WP8WC3V) was an excellent solution. The Argon One case is easy to mount and has sufficient passive cooling for processing of 4 channels in parallel. The RPi 4 is able to process these 4 channels in parallel at 90% of load on 1 core. We noticed that the RPi 3B+ cannot handle 4 channels coming from RSP1A. So if you want to receive just 1 or 2 channels, the RPi 3B+ and RTL may be good enough. Otherwise we would suggest you go with the RPi4. One of our next posts will discuss the settings of the processing pipeline in the RPi and what can be tweaked.
We hope you got some better insight into the HW needed for receiving, processing and feeding the ATC communication. There are also other possibilities, so please do not hesitate and search for it. What we put here is our experience and what worked for us for a reasonable budget.
